From:http://www.slatedroid.com/topic/41453-pre-alpha-02-ubuntu-linux-for-ug802-and-mk802-iii/
Title says it all. No hand holding at this stage as this is really for people who know what they are doing. In a few days I'll post a proper Alpha with more/some support!
Folks, I can't stress this enough: these pre-Alpha releases are only for people who have already cross-compiled the Linux kernel for an ARM device and are used to having things not working out-of-the box.
And no, it won't play movies nor will it run XBMC at this stage, and you can't play any games with it yet (no OpenGL support).
Present version is pre-Alpha 0.2
Download links:
Two parts
The kernel
ug802recovkernel.img (<10mb nbsp="nbsp" span="span">https://docs.google....ZjUwNzFjZ1lqMTg
The armhf Ubuntu 12.10 root filesystem
linuxroot.tar.gz (<1gb nbsp="nbsp" span="span">https://docs.google....UnM4RlllWGpScXc
(the Ubuntu rootfs includes the kernel source for the RK3066 kernel, that's why it's so big)
PLEASE MIRROR THESE FILES AND POST A LINK BELOW!
Requirements:
To install:
- Rooted Android stick and SuperUser.apk installed.
- Terminal emulator in Android.
- microSD card (4GB, 8GB or 16GB) or USB key.
- A Windows/Linux PC.
- RKAndroidTool v1.35 (Windows program to flash RK3066 devices).
If you have installed a Finless Android ROM on your Android stick using the Flash method then you already have everything you need to proceed with the installation.
The zip file that includes Bob's ROM also has the RKAndroidTools v1.35 and full, detailed installation instructions, so please get it!
To use Linux you'll probably need:
- USB 2.0 hub
- USB keyboard and mouse.
- HDMI monitor (Full HD capable i.e. 1920x1080@60Hz).
- An inexpensive USB WiFi b/g/n or Ethernet 10/100 adapter dongle.
Kernel Installation
(there are many ways to do this, here is a simple one that should take less than a minute)
- Install RKAndroidTools v1.35 on your Windows PC.
- Download the kernel.img file to your Windows PC. Rename it recovery.img.
- Connect Android stick to your PC and run RKAndroidTool v1.35.
- Open the terminal emulator and "su", then "reboot bootloader"
- RKAndroidTool should now detect Android stick.
- Flash only the new recovery.img to the recovery partition in the NAND. This takes 5 or 6 seconds, and your Android stick will immediately reboot into Android. THIS IS NORMAL.
Now that you have installed the Linux kernel in the recovery partition of your Android stick, you can dual boot Android or Linux.
To boot Linux, boot into Android, open the terminal emulator and "su", then "reboot recovery".
Notes:
* There is only one user defined: user ubuntu password ubuntu. Needless to say, change the password ASAP!
* The kernel config is available in /boot and also in /proc/config.gz.
* The kernel source is in the home directory of user ubuntu.
* And you have the nbench benchmark in /root.
Rootfs Installation
(again there are many ways to do this, here is a simple one)
Requires a Linux PC.
If you don't have a Linux PC, you can use the GParted LiveCD: http://gparted.sourc....net/livecd.php
1. Use GParted to create an ext4 partition of at least 4GB on a USB key or a microSD card. Label the partition linuxroot.
2. As root, extract the tarball, and copy (using cp -a) all the files in the extracted directory to the partition labeled linuxroot. This will create a Ubuntu root filesystem on the USB key or microSD card with all the proper permissions.
Changelog
- pre-Alpha 0.1: Initial release, requires microSD card.
- pre-Alpha 0.2: Simplified boot requirements. Can now boot from a root partition labeled linuxroot on any mass storage device accessible at boot time e.g. a 4GB USB key, a 8GB SD card in USB card reader plugged into the USB hub, or a microSD card in the microSD card slot. Should even boot from a USB hard disk, but haven't tested this.
 Since ZhuoDaShi did not initially detect a connected Android device, it is in watchdog mode, monitoring your PC's USB bus for signs of an Android device running adb. We need to give it something to find.
G. On the MK802 III, go to Settings->DEVICE->USB. To the right, you should see the text Connect to PC followed by a checkbox. Go ahead and check the box. This will automatically turn off WiFi on the MK802 III and start up the adb daemon on the USB bus. It will also start enumerating several file shares over the USB bus-1 for the SDCARD share which is actually a NAND partition on the MK802 III, one for the MicroSD media, if present, and one for each external share configured on the MK802 III. Windows may detect these shares and automatically install drivers to support them.
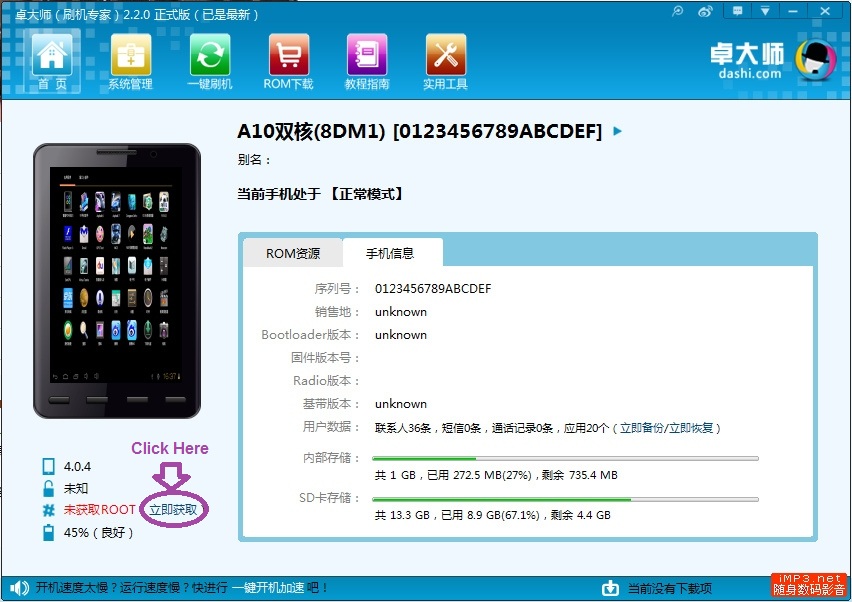
ZhuoDaShi should now detect the MK802 III and display the following dialog:
 H. Click in the area I have circled in purple. You are telling ZhuoDaShi to root the device.
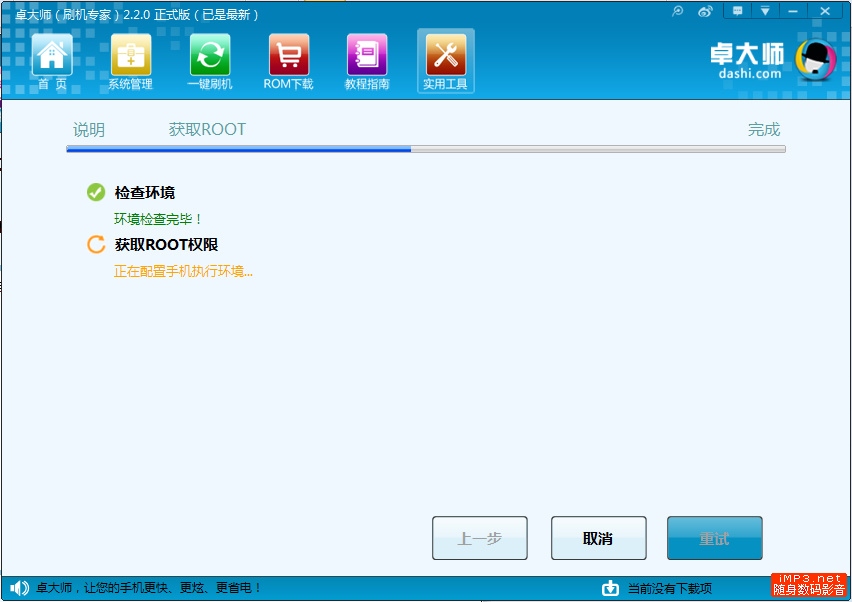
ZhuoDaShi will launch the following dialog as it runs the rooting script on the MK802 III using adb.
 Once ZhuoDaShi has successfully rooted the MK802 III, the indicator will change color to green to indicate it has successfully rooted the device.
I. On the MK802 III, go to Settings->DEVICE->USB. Uncheck the box to the right of Connect to PC. If WiFi does not automatically turn on, then turn it on yourself. Once you have an internet connection established, proceed to the next step.
J. Launch Google Play on the MK802 III and search for superuser. Select the Superuser app by ChainsDD (a free app) and install it. Once it has installed, search for busybox. Select the BusyBox Installer by JRummy Apps Inc (also a free app) and install it.
K. Now run the Busybox Installer. The Busybox Installer will automatically select the most recent version of busybox available. However, on the second drop down dialog, where it asks you to Select install location, you will need to click on the drop down arrow and select /system/bin. Now click the install button and let it install. Note that if you ever run the Busybox installer, you will need to select the /system/bin folder as the install location.
L. Congratulations !! Your MK802 III is now rooted and has the latest versions of superuser and busybox installed.
